HTTPS Setup on Subdomains
In this article I explain how I run multiple docker containers, each having its own subdomain, serving http but being visible to the outside wold through https.
The first steps is to buy a domain and a virtual private server (or VPS for short). There are tons of options, I used google domains to buy a domain, and linode.com as my cloud provider.
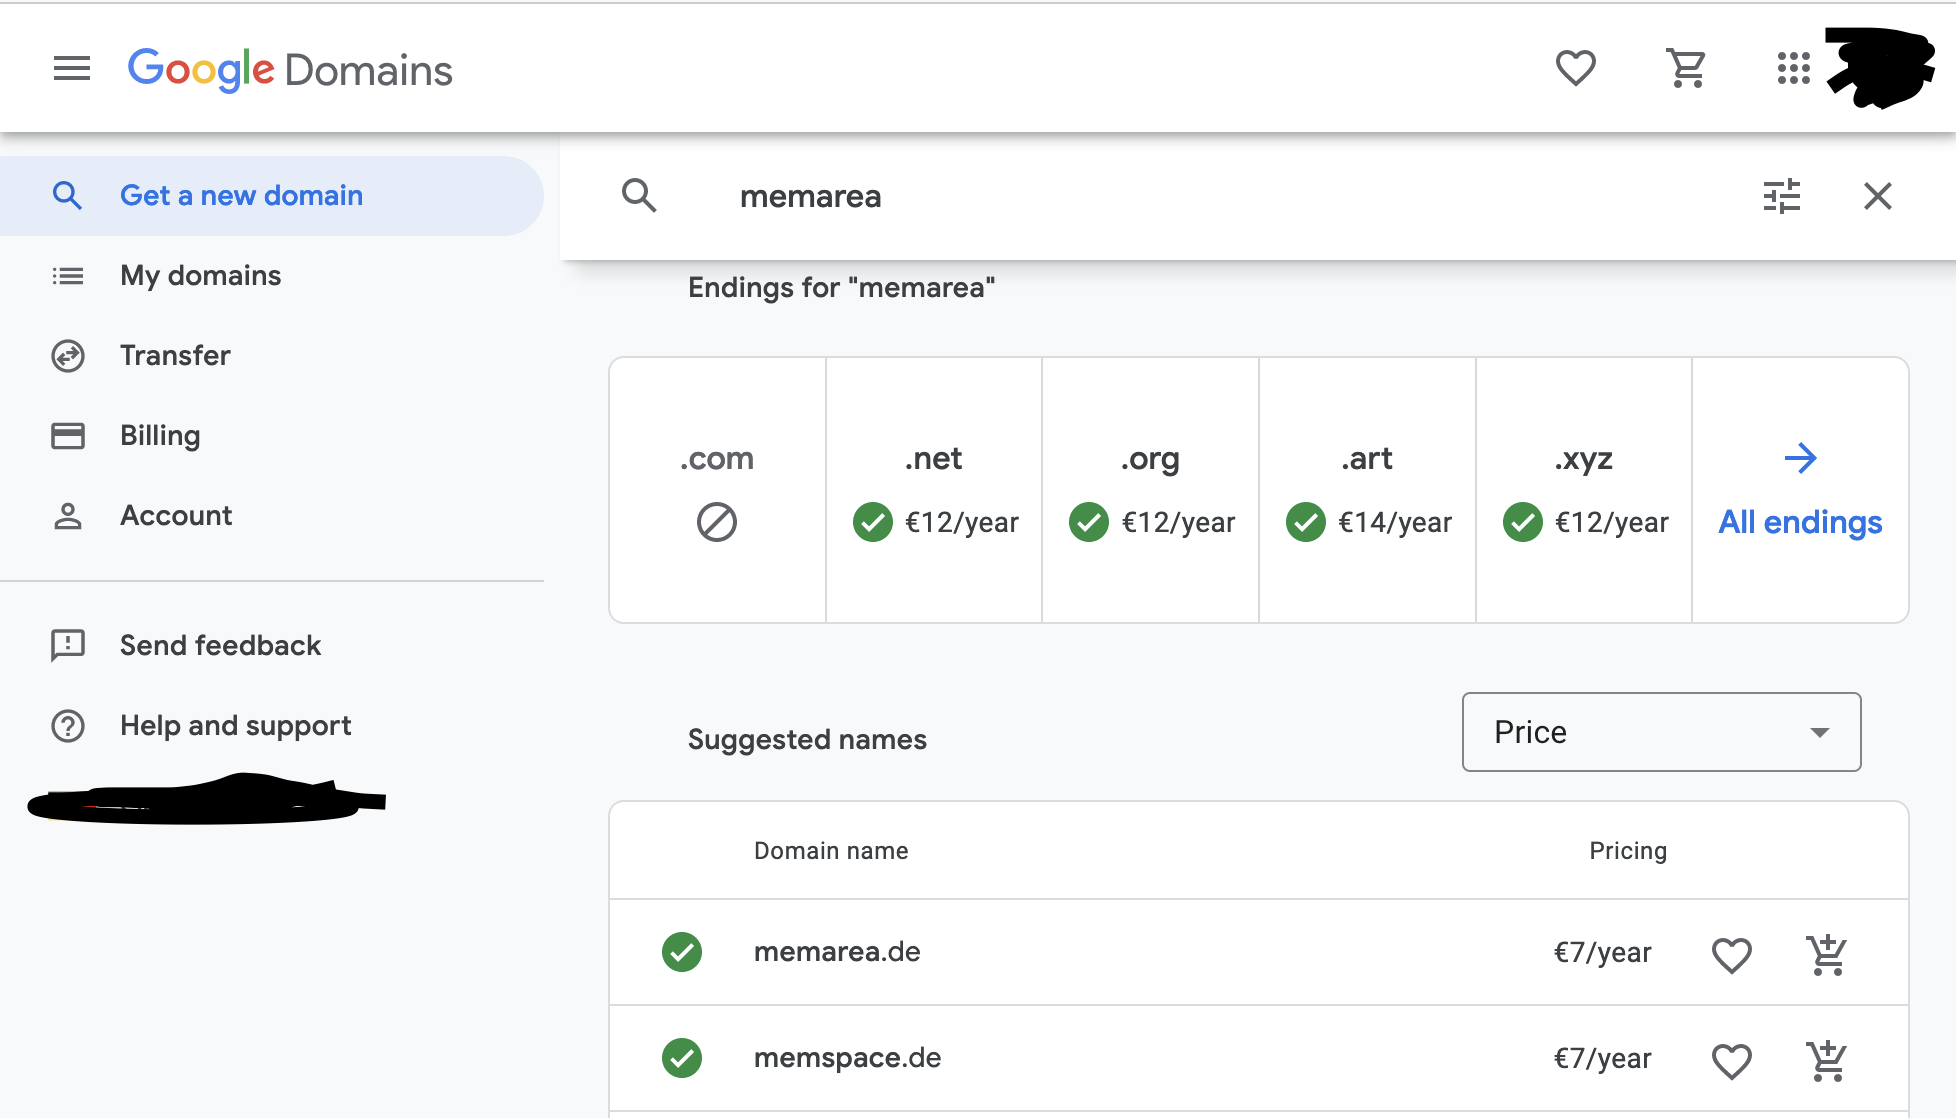
How to buy a domain
Go to domains.google.com and follow the UI, you can find many domains for less than 10$/year, depending on your location as low as 5$/year.
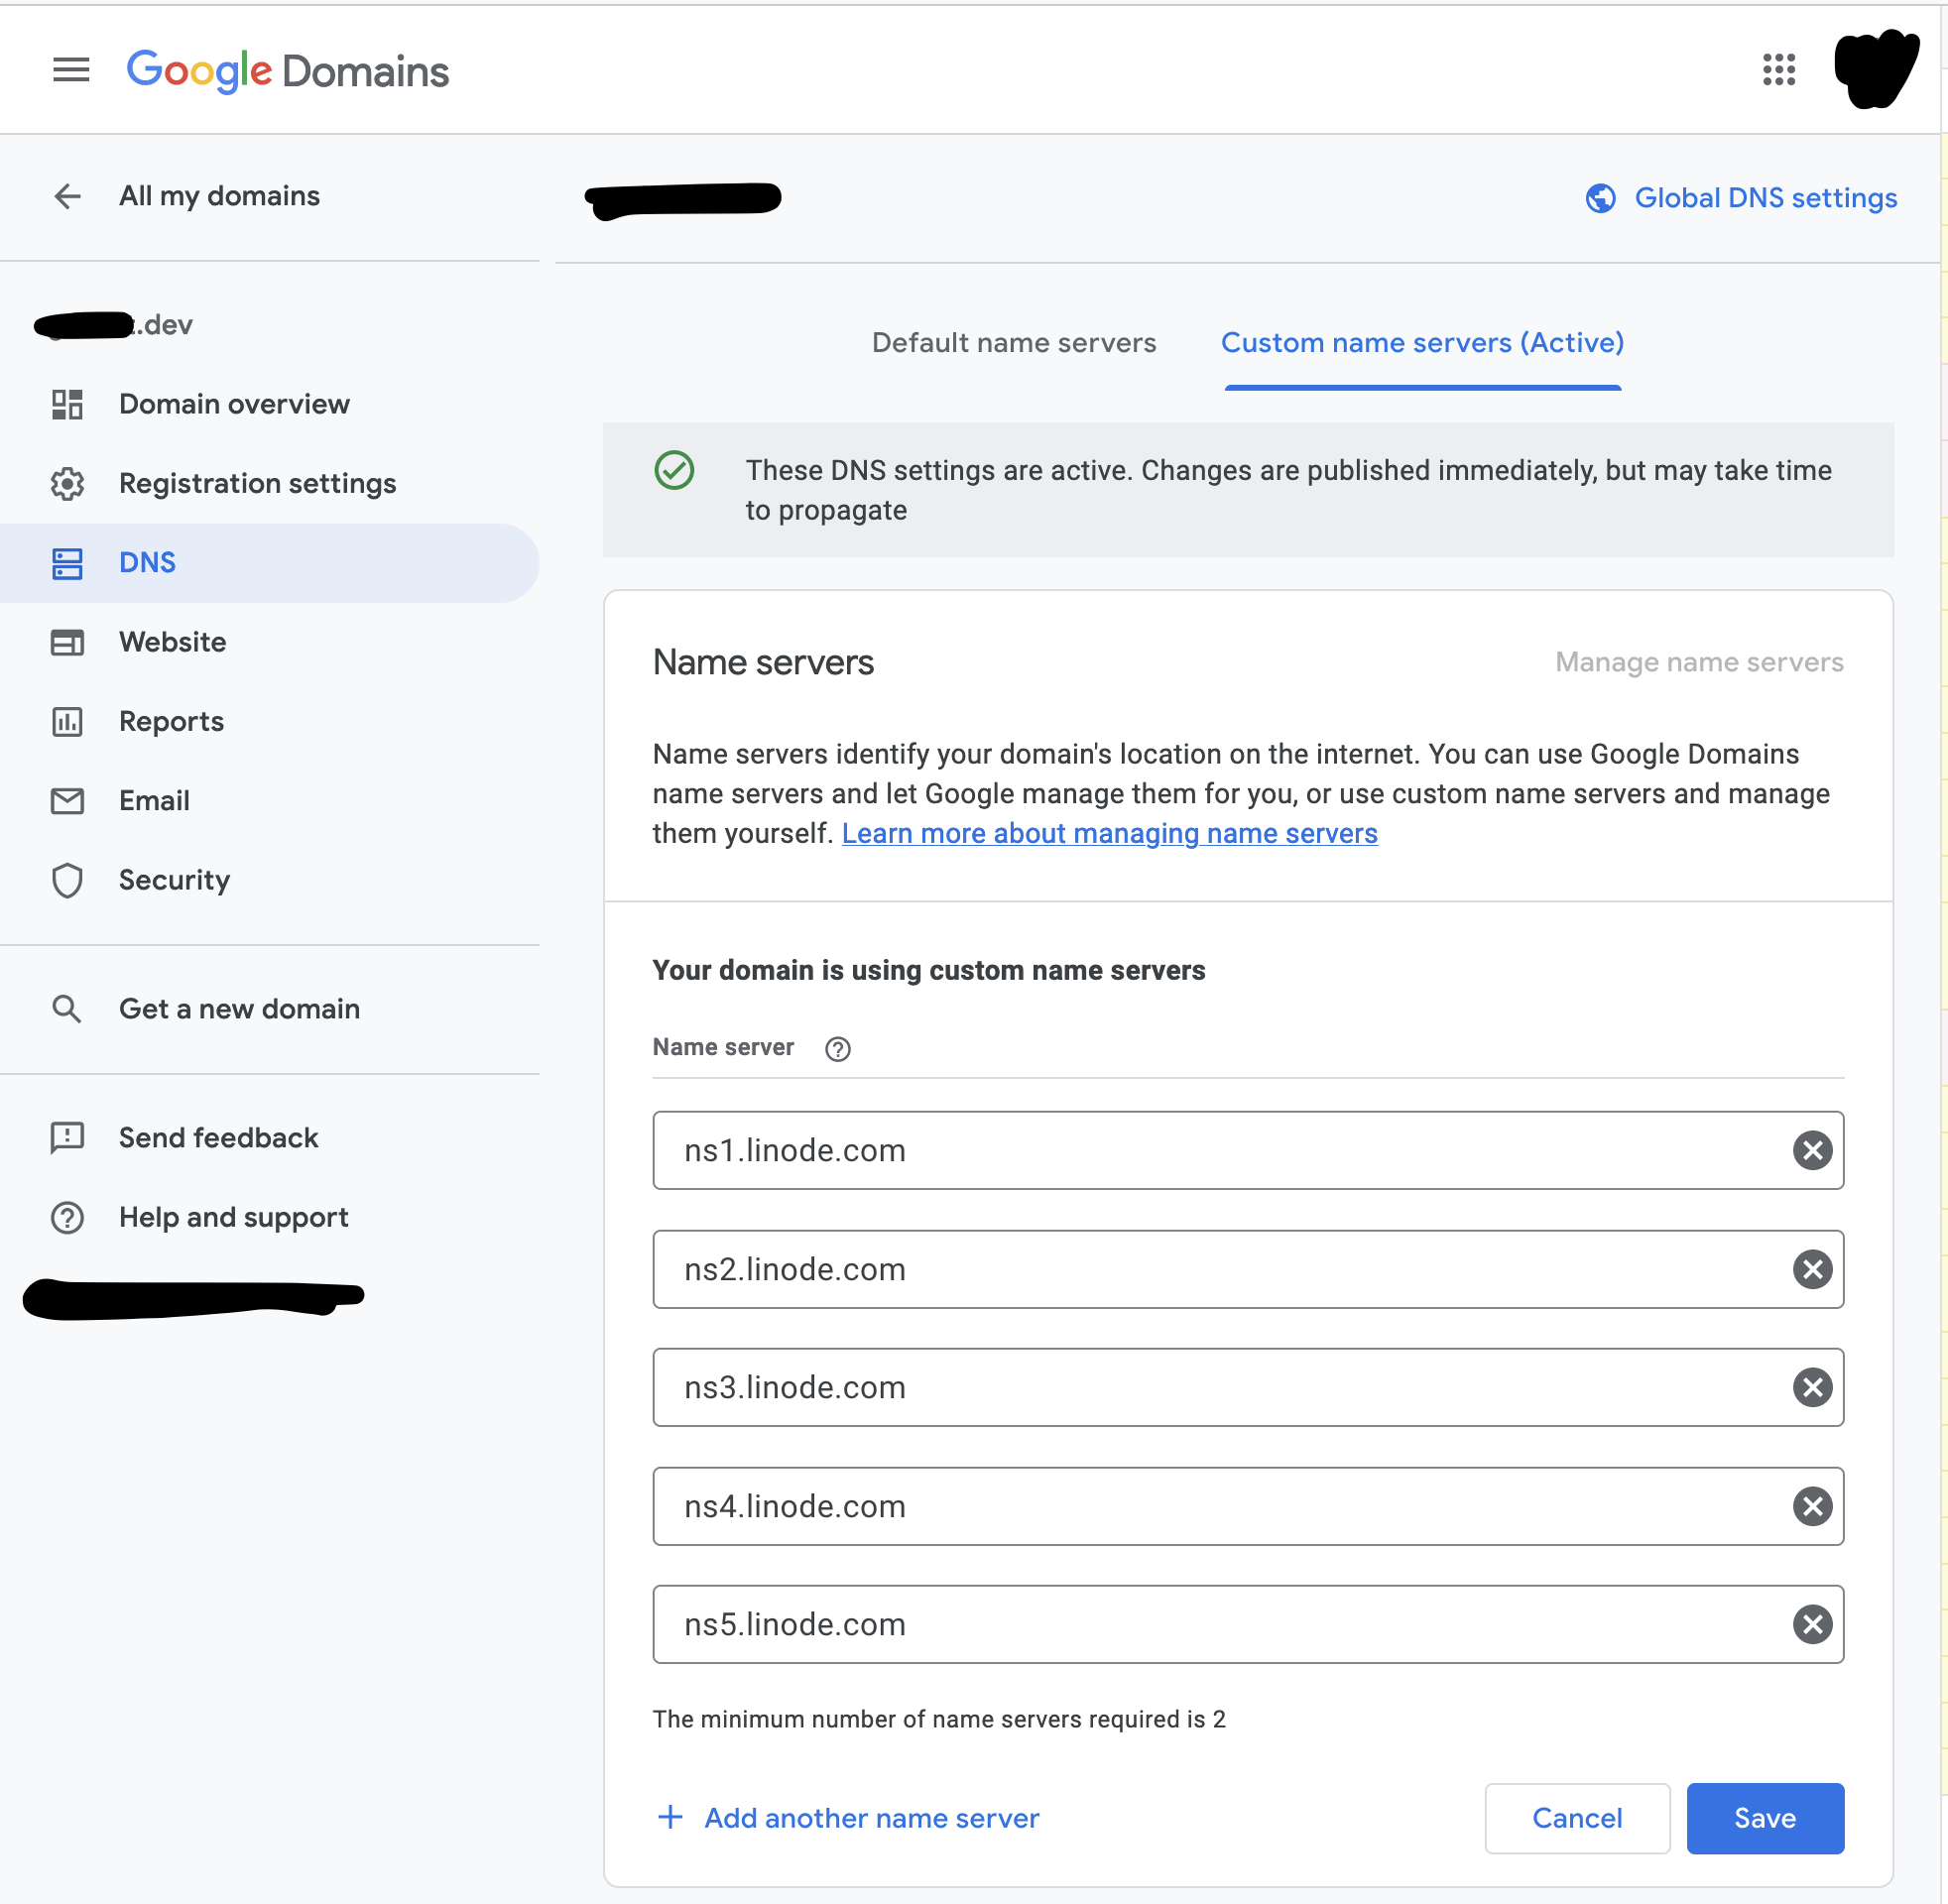
Although Google can be used to manage DNS records directly, I used the linode dns manager, to do that we I set linode name servers on the google domain.
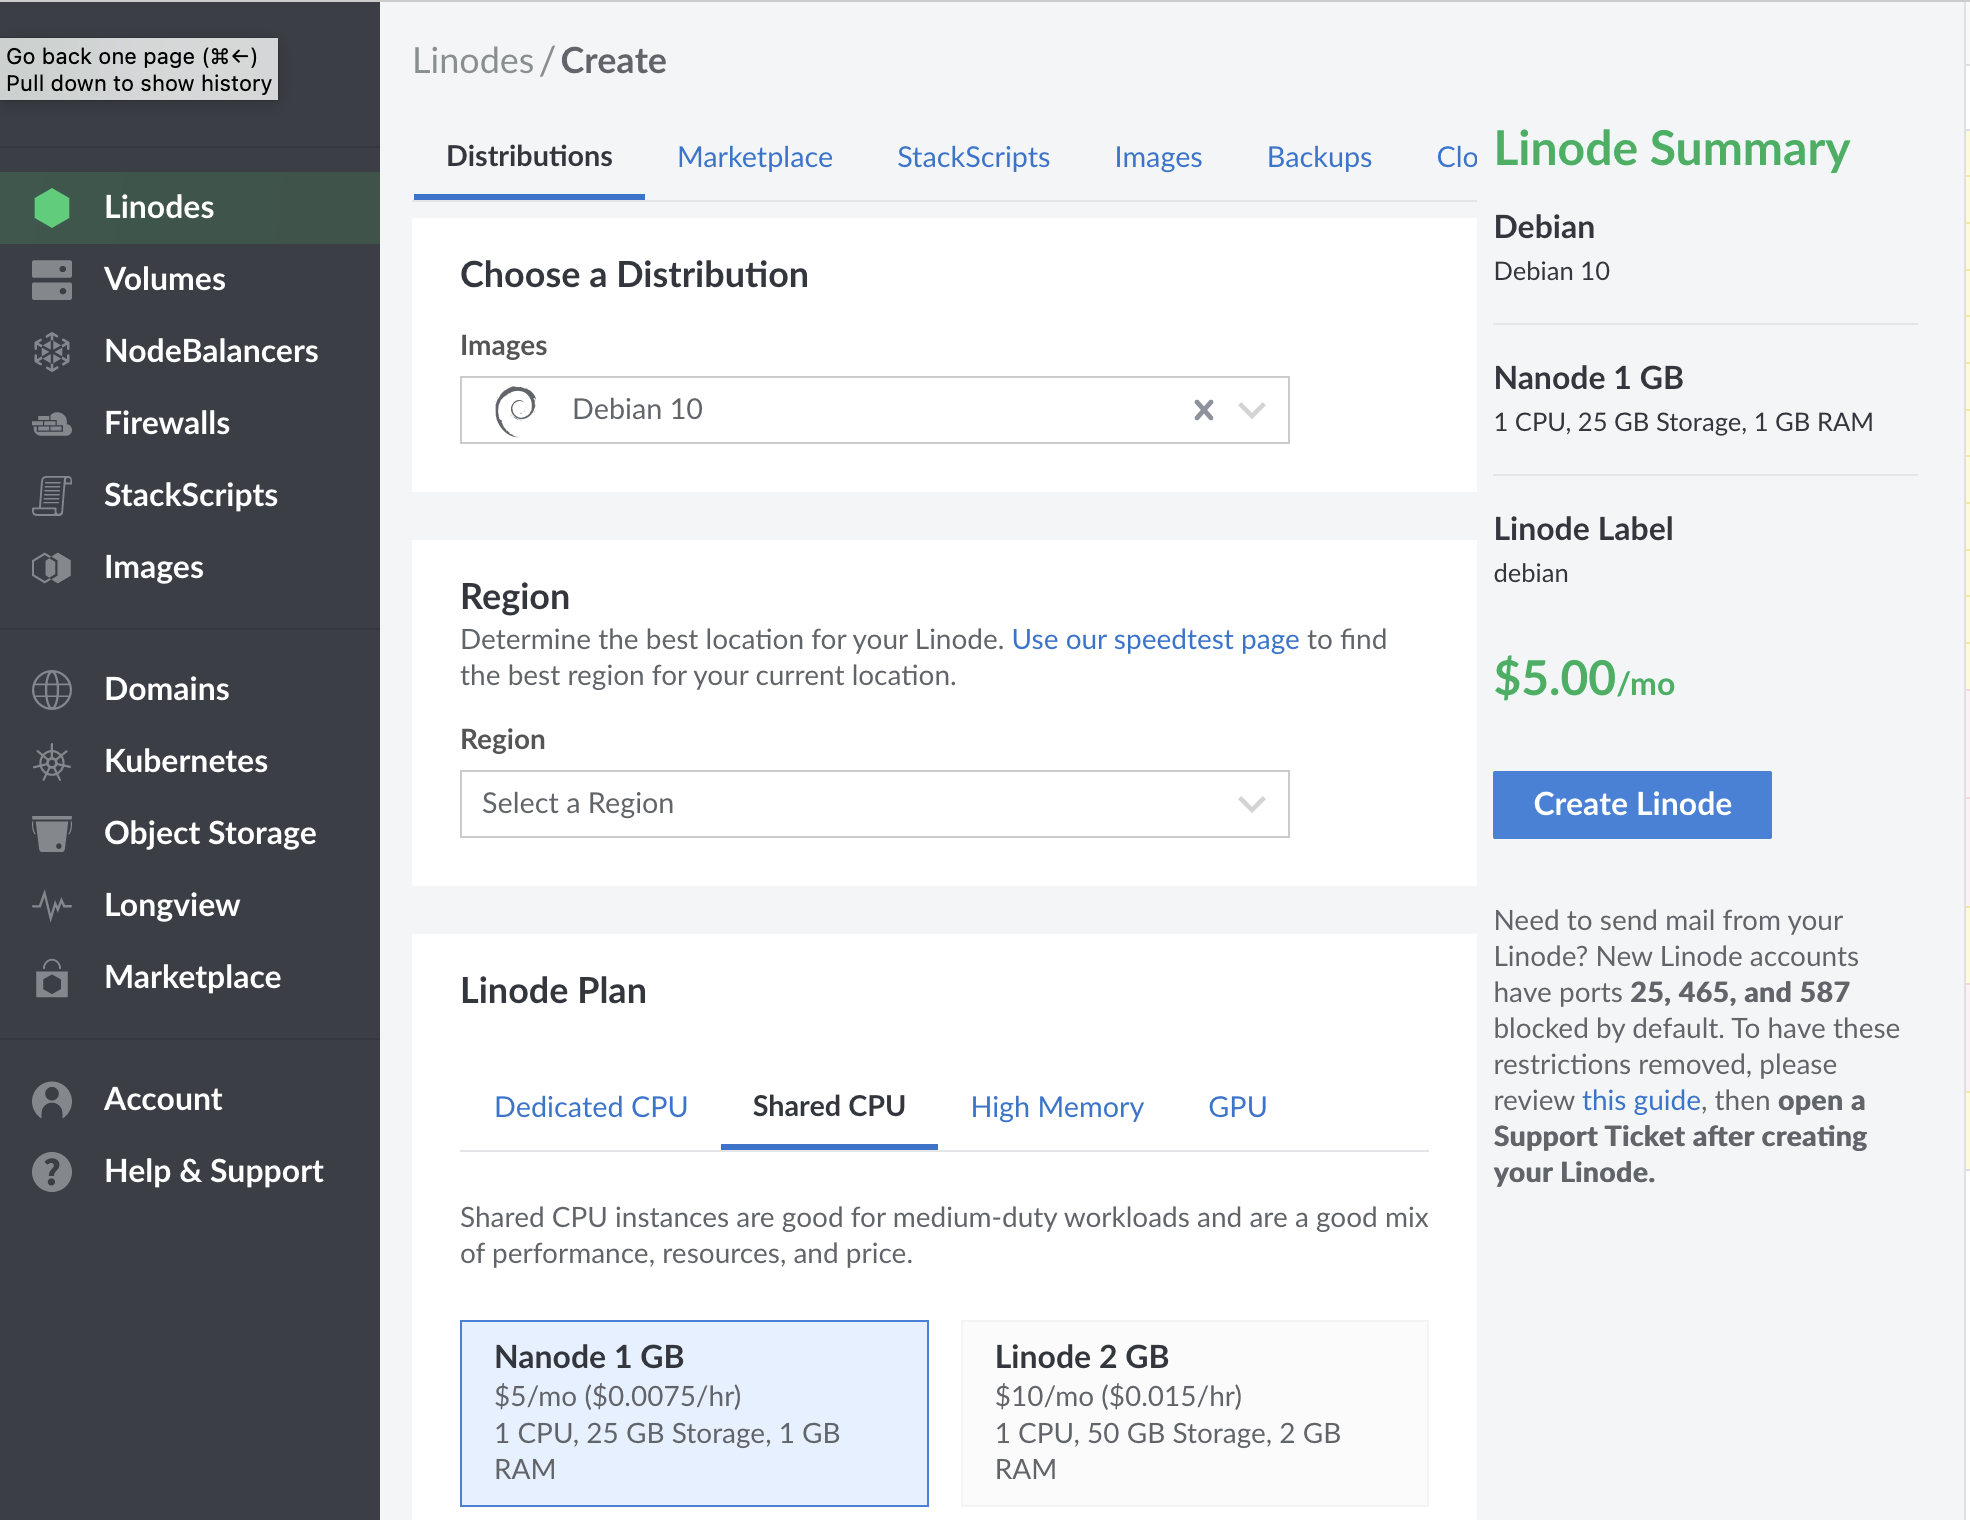
How to buy a Linode
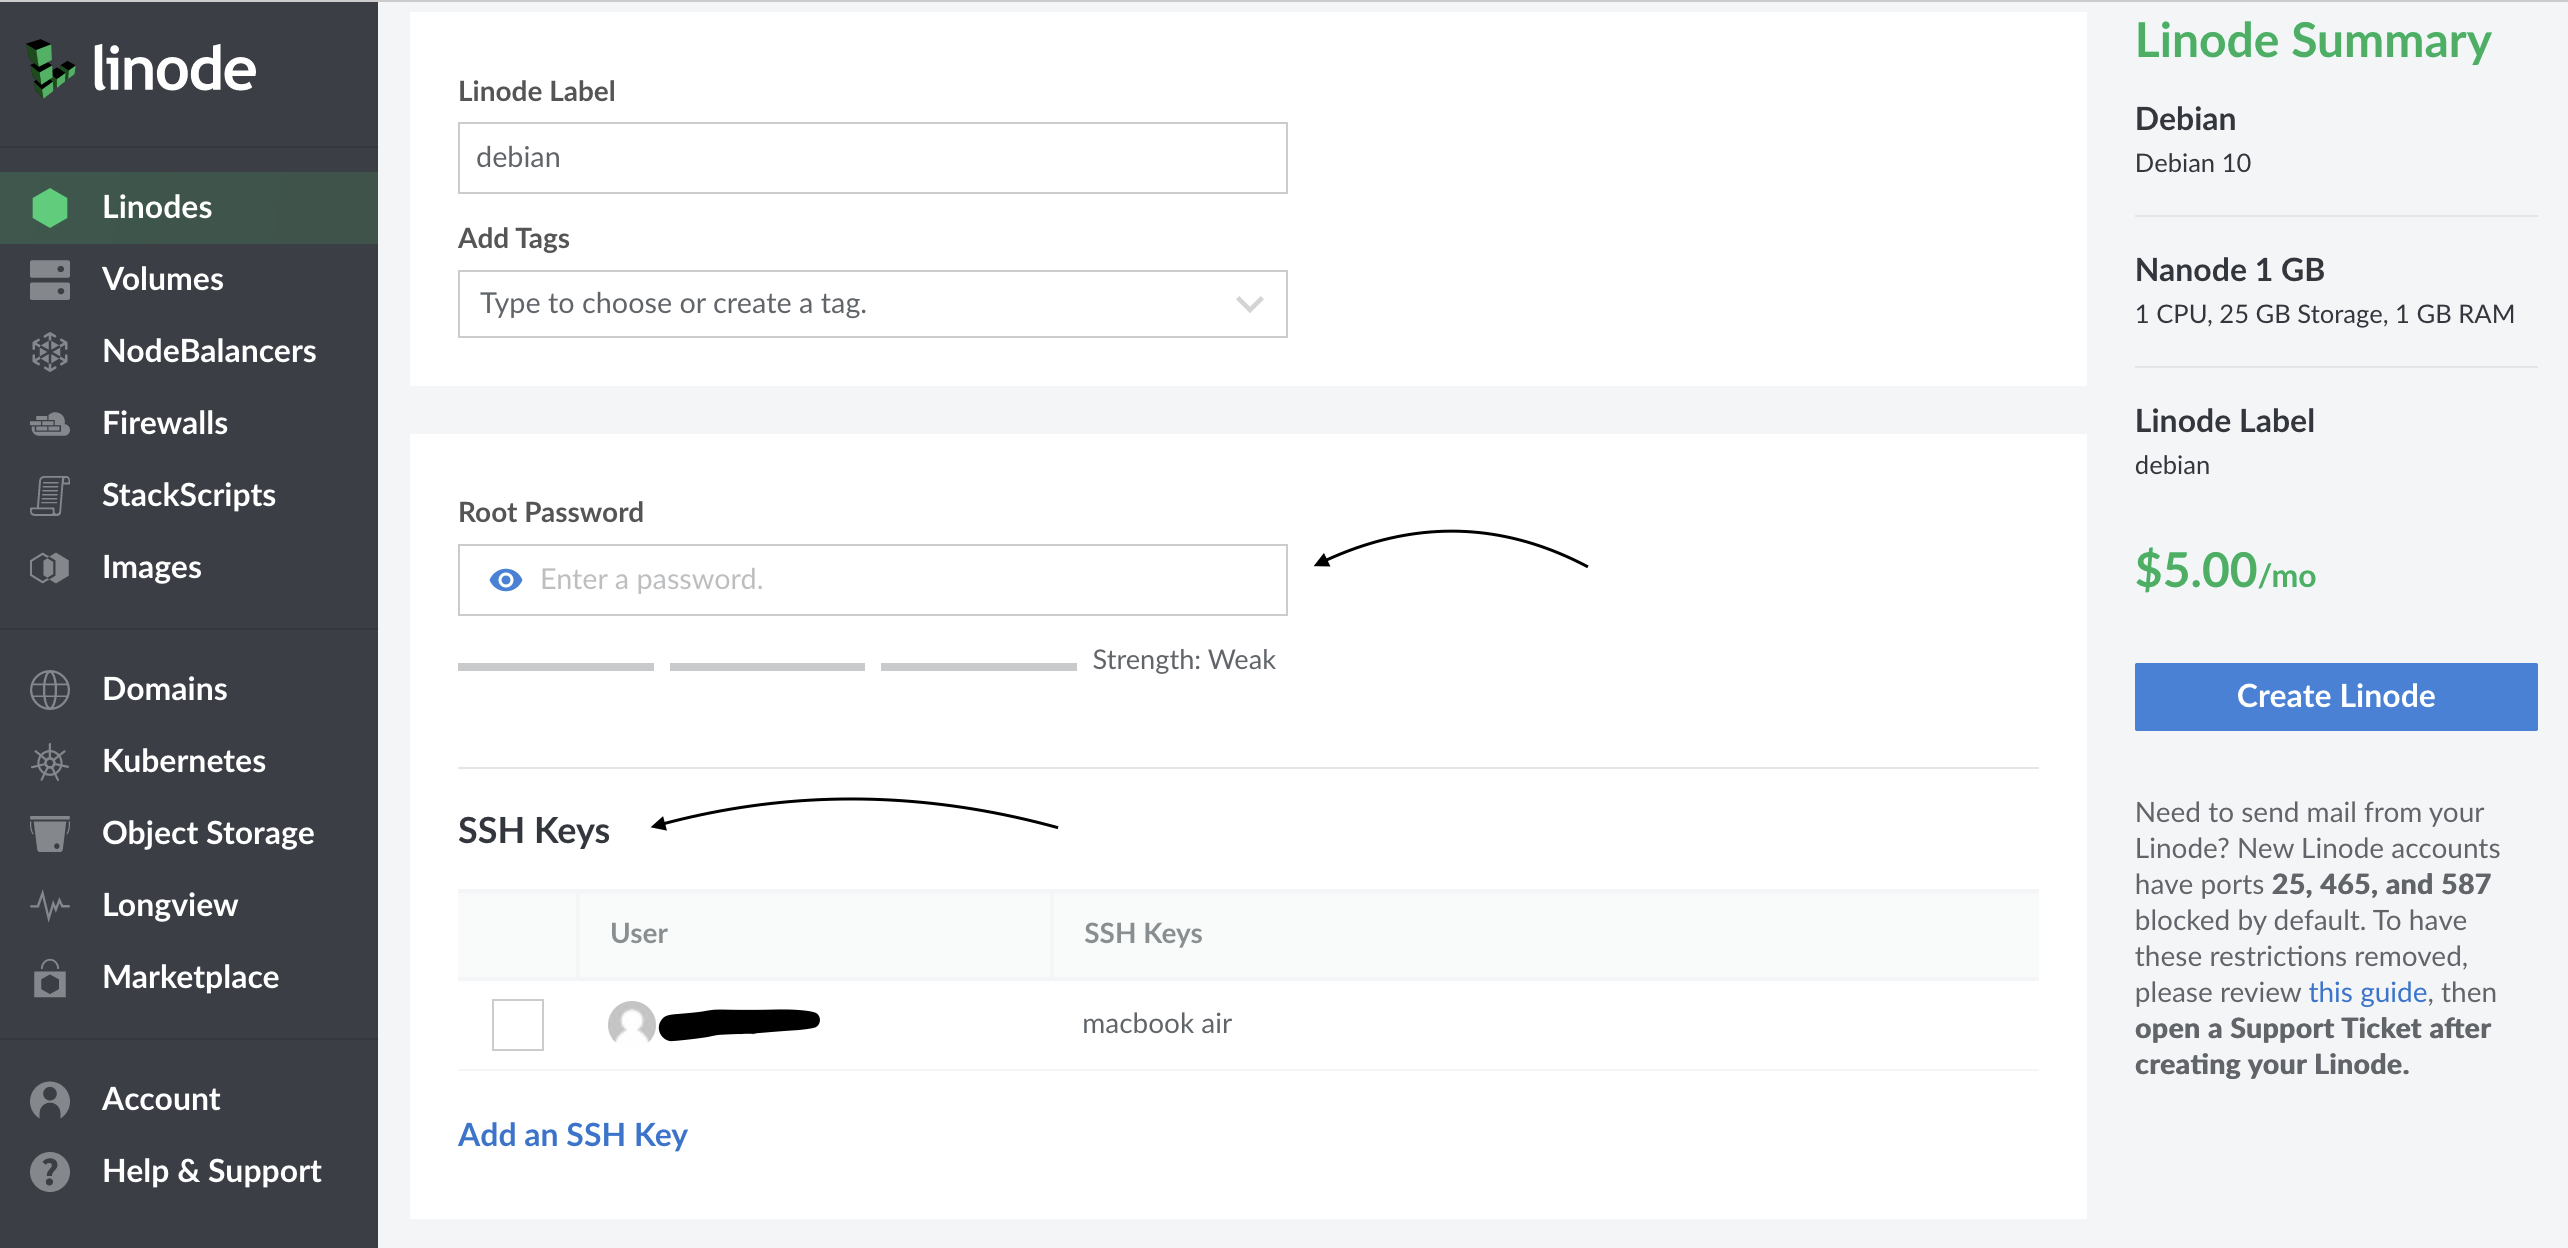
It’s time to buy a VPS from linode, I chose Debian because it’s very stable distribution, and has a great support & community.
If you scroll down, there is a section for the root password.
Once your server is created, up, and running, use that password for the ssh command.
ssh root@<vps-ip-address>
# type your root password
If you do use ssh keys, you can set your keys as well. That will eliminate the need to type your password every time.
You can skip this step, If you don’t use ssh keys and are not familiar with them.
# copy public key to clipboard on MacOS
cat ~/.ssh/id_rsa.pub | pbcopy
# copy public key on Linux
cat ~/.ssh/id_rsa.pub | xclip -selection clipboard
Once the server is created, log into your node.
As a bonus you can give your server a nickname in ~/.ssh/config.
Host linode
  HostName <server.ip.v4.addr> # ip without the <,>
  User root
  ForwardAgent yes
And use that nickname with ssh command.
ssh root@<server.ip.v4.address>
# or use the nickname if you have setup your ~/.ssh/config file
ssh linode
How to install docker
The steps to install docker and docker-compose on linode is well, documented.
Here is the commands I used for debian:
# install a few common terminal tools
apt update
apt install tmux git build-essential tree wget curl

# setup docker pre-requisites
apt install apt-transport-https ca-certificates curl gnupg lsb-release
curl -fsSL https://download.docker.com/linux/debian/gpg | sudo gpg --dearmor -o /usr/share/keyrings/docker-archive-keyring.gpg

echo "deb [arch=amd64 signed-by=/usr/share/keyrings/docker-archive-keyring.gpg] https://download.docker.com/linux/debian $(lsb_release -cs) stable" | sudo tee /etc/apt/sources.list.d/docker.list > /dev/null

# install docker
apt update
apt install docker-ce docker-ce-cli containerd.io

# start the docker daemon
systemctl start docker
systemctl enable docker
systemctl enable containerd

# install docker-compose
wget https://github.com/docker/compose/releases/download/v2.0.1/docker-compose-linux-x86_64
mv ./docker-compose-linux-x86_64 /usr/local/bin/docker-compose
chmod +x /usr/local/bin/docker-compose
Before setting up docker-compose and talking about subdomains, lets take care of one more thing.
How to import your domain to linode
On the left panel side, you can import your domain, as long as the domain registrar points to linode name servers ns<1, ..., 5>.linode.com.

If you choose an existing server, in this case debian-ca-central, linode automatically adds the necessary dns records.
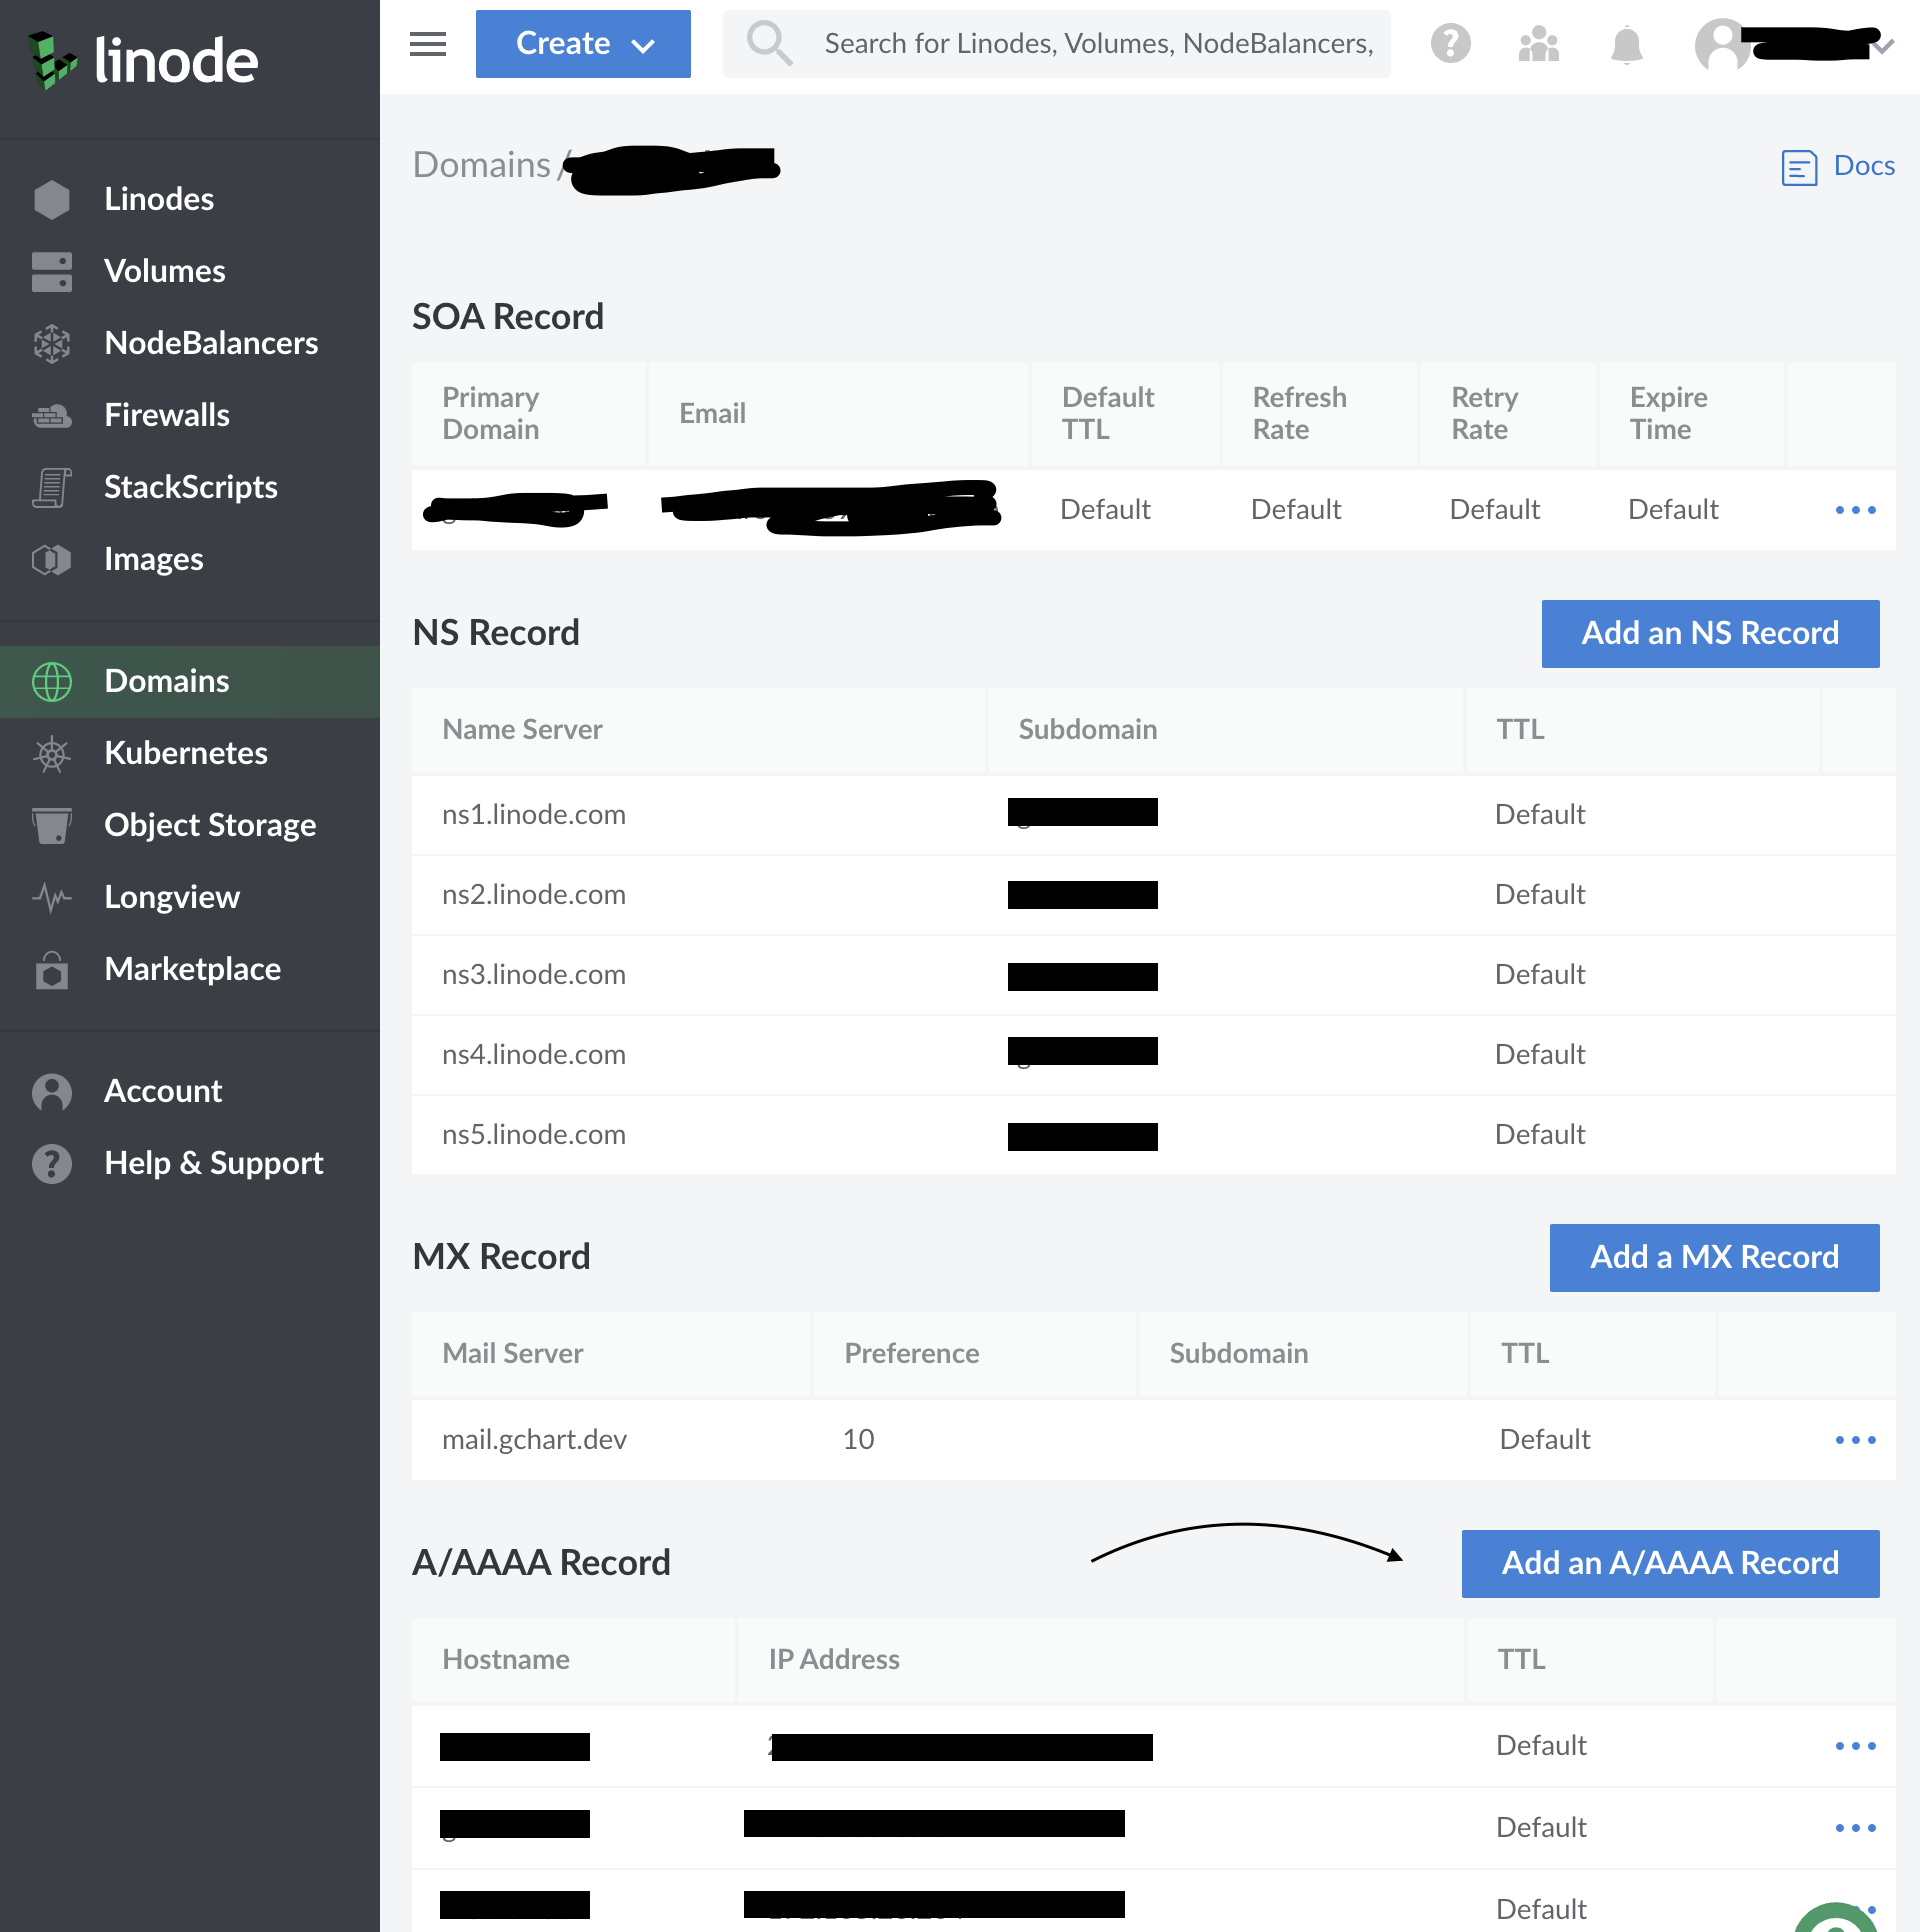
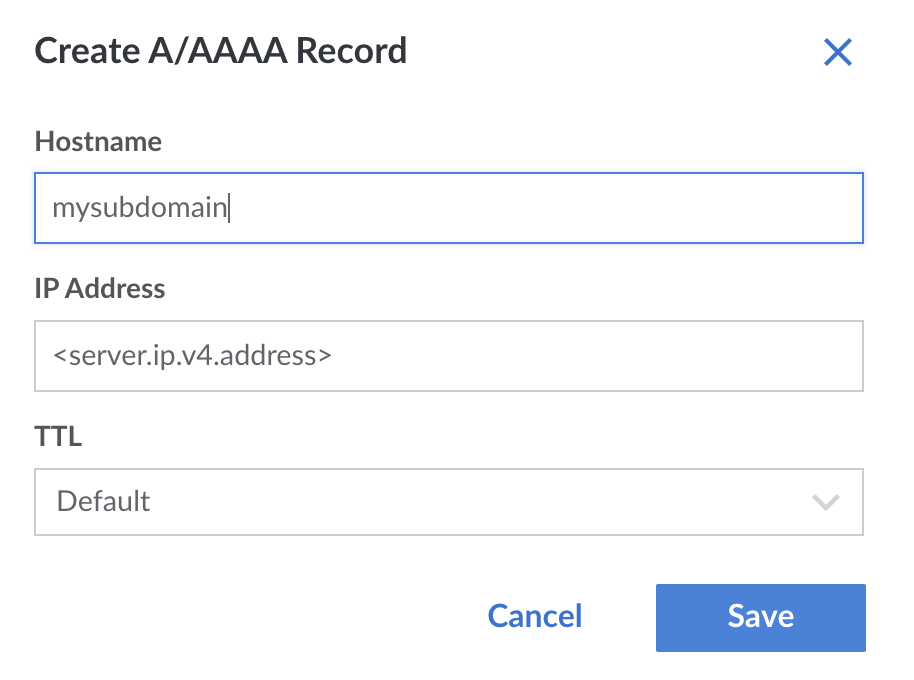
To Add subdomains, click on Add an A/AAAA Record and use the same ip address as the server.
Later in the tutorial we will configure nginx to proxy the traffic for multiple subdomains. For now make sure to add a subdomain named filebrowser which we will set up shortly.
How to setup nginx for https
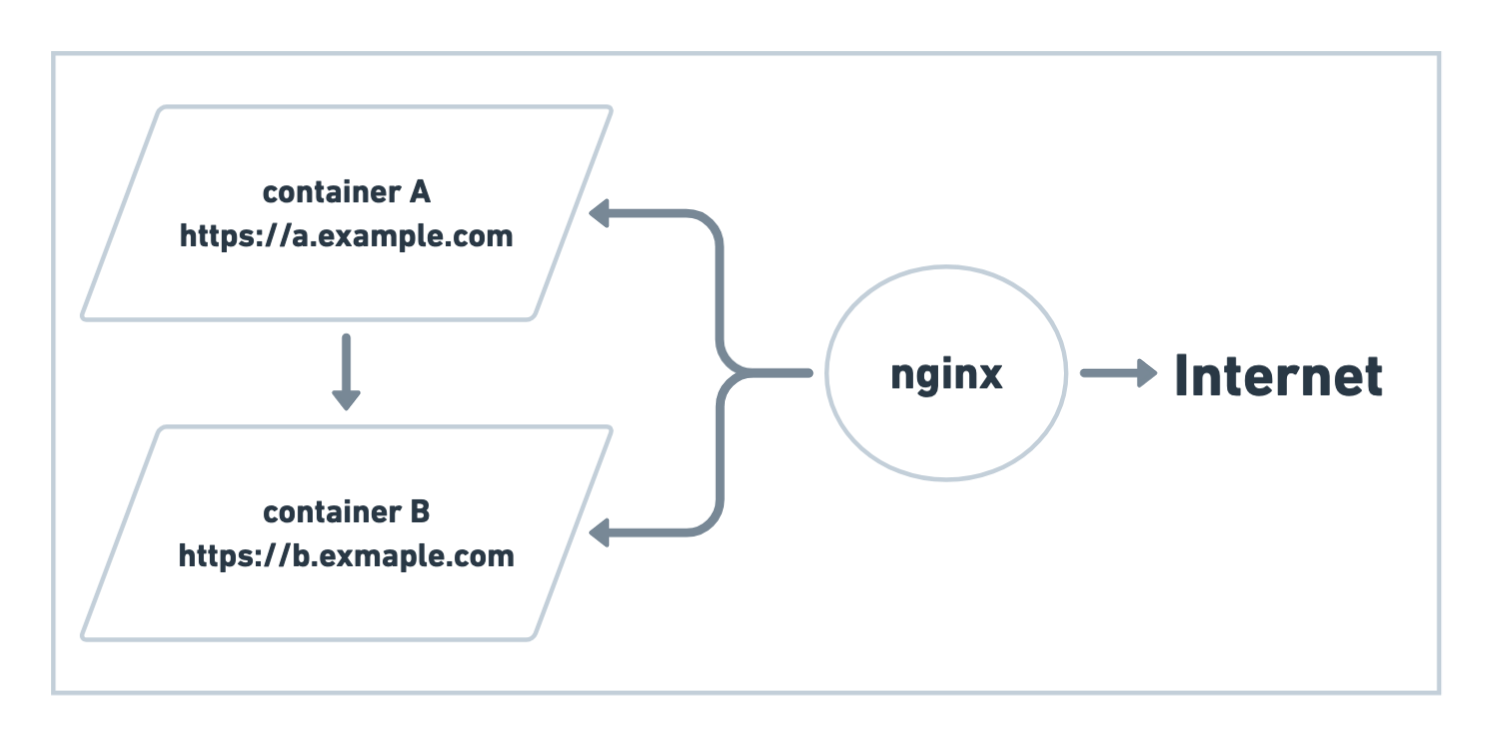
We want to to run multiple containers, each serving http, have a nginx in front of everything, and proxy their traffic over https.
The swag container is the perfect tool for this, It comes preloaded with a nginx server, and it does support the http to https reverse proxy.
We will create a docker-compose.yml to run the swag container on our main domain.
I’m using filebrowser as an example container to run on a subdomain.
Make sure to add a subdomain on linode with the same name.
version: "3.9"

services:
  filebrowser:
    image: hurlenko/filebrowser
    user: "${UID}:${GID}"
    ports:
      - 8080
    volumes:
      - /root/.filebrowser/downloads:/data
      - /root/downloads:/config
    environment:
      - FB_BASEURL=/filebrowser
    restart: unless-stopped
  swag:
    image: lscr.io/linuxserver/swag
    container_name: swag
    cap_add:
      - NET_ADMIN
    environment:
      - PUID=1000
      - PGID=1000
      - TZ=Europe/London
      - URL=gchart.dev
      - VALIDATION=http
      - CERTPROVIDER= #optional
      - DNSPLUGIN= #cloudflare #optional
      - PROPAGATION= #optional
      - DUCKDNSTOKEN= #optional
      - EMAIL= #optional
      - ONLY_SUBDOMAINS=false #optional
      - EXTRA_DOMAINS= #optional
      - STAGING=false #optional
      - MAXMINDDB_LICENSE_KEY= #optional
      - SUBDOMAINS=www,filebrowser # <==== important
    volumes:
      - /root/.swag:/config
    ports:
      - 443:443
      - 80:80 #optional
    restart: unless-stopped
Note the SUBDOMAINS= environment variable, it has a comma separated list of subdomains that nginx should handle.
On the first run, we the nginx config files will be created under /root/.swag/config, but our filebrowser container won’t be accessible yet.
We need to create a nginx config file and restart everything.
Start everything, swag writes the initial config files:
docker-compose up -d
you can check the logs, if needed by this command:
docker-compose logs -f swag
After swag config files have been created, we need to create a proxy conf for our subdomain filebrowser.*. Swag comes with sample config files files under .swag/nginx/proxy-confs/*.
$ cd .swag && tree .
.
|-- ...
`-- nginx
    |-- nginx.conf
    |-- ...
    |-- proxy.conf
    |-- proxy-confs
    |   |-- ...
    |   |-- ...
    |   |-- ...
    |   |-- filebrowser.subdomain.conf
    |   |-- filebrowser.subdomain.conf.sample
    |   `-- filebrowser.subfolder.conf.sample
    |-- ...
    `-- worker_processes.conf
As you can see the proxy-confs folder has lot of examples, it happens to have a .subdomain.sample file for filebrowser, we simply copy this file without the .sample suffix.
The proxy conf file is a yml file that forwards all traffic to another container, in this case filebrowser:8080.
server {
    listen 443 ssl;
    listen [::]:443 ssl;

    # the subdomain goes here
    server_name filebrowser.*;

    include /config/nginx/ssl.conf;
    client_max_body_size 0;

    location / {
        include /config/nginx/proxy.conf;
        include /config/nginx/resolver.conf;

        # docker container name and port
        set $upstream_app filebrowser;
        set $upstream_port 8080;
        set $upstream_proto http;
        proxy_pass $upstream_proto://$upstream_app:$upstream_port;
    }
    # ...
With that, lets restart everything, and check if everything is working
docker-compose down
docker-compose up -d
# if needed, check the logs with
docker-compose logs -f
The top level domain, should handle https, and serve the default swag files. We can change this later on by editing .swag/nginx/nginx.conf file to proxy the traffic to yet another container.
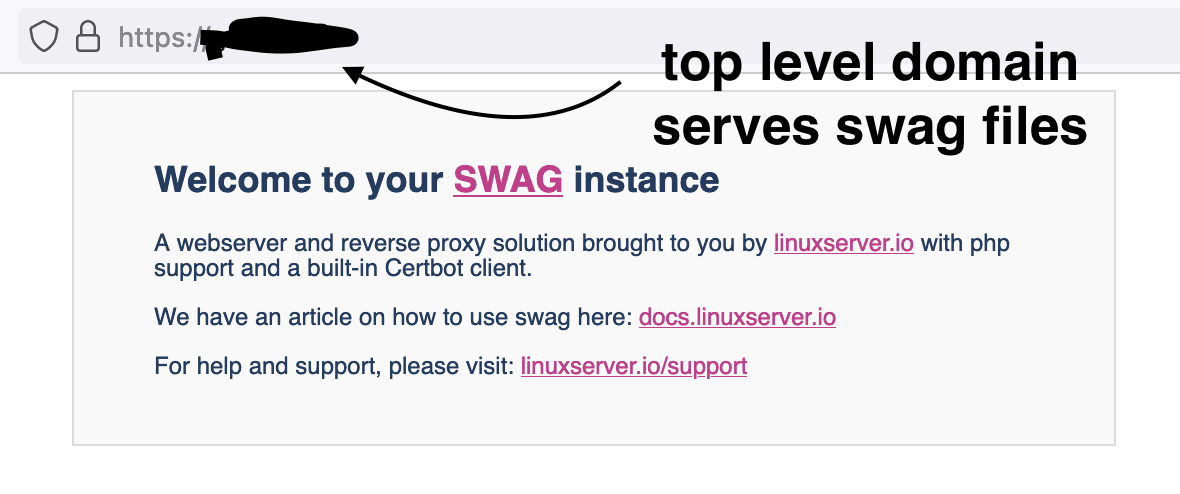
And the subdomain, is served as https, in this case points to our filebrowser example.
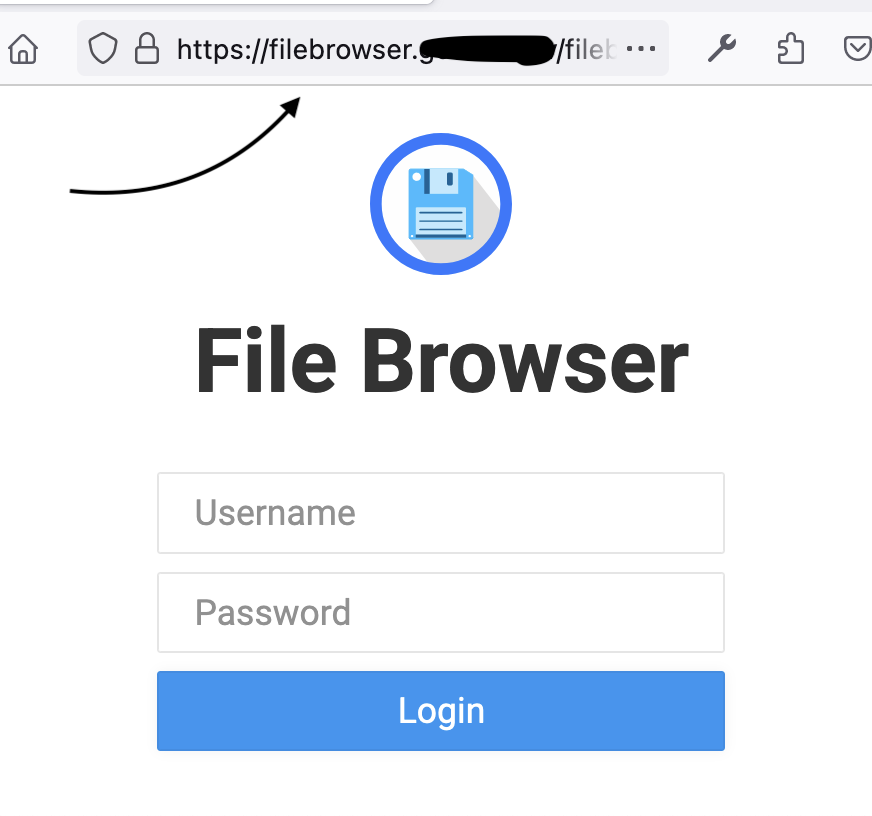
If you have followed the tutorial so far, the username and password are both admin for filebrowser initially, you can change them in the app.